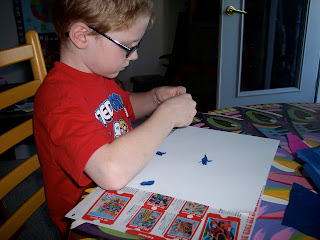
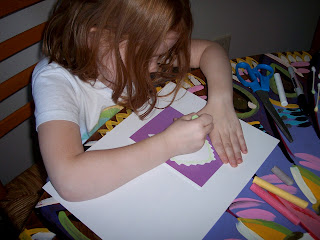
This is a post that I have wanted to do for some time now, but just never sat down to write it. At the kid's school they no longer have art classes. Due to budget cuts, that was one of the things to go. Let me tell you, that was a giant shock when we heard that last year when L started school. We had heard there was a parent volunteer art program called Art Smart and Adam and I signed up for it right away. Then at the first PTO meeting they said they were looking for someone to head up the whole program. Of course I said yes! So here we are, a year under my belt, of running the whole school's Art Smart program. What a fantastic thing it is! The kids love art, and jump at any chance they get to dabble in it. I wanted to share a few of the projects we worked on last year in kindergarten. I am hoping to share more as I help in kindergarten and first grade this year.
Saturday, October 27, 2012
Art Smart
Posted by Hippie Mama Kelly at 3:26 PM 1 comments
Labels: Art Smart, Color Wheel, Frankenthaler, kindergarten crafts, Miro, Monet, Pollock
Sunday, October 7, 2012
Apple Picking 2012
Yesterday was our annual trip out to Garwood Orchards to do our apple picking! This year's crop, pretty much all over Indiana and Michigan was either totally destroyed or almost all destroyed by a late frost in April. Garwood had 70% of their crop wiped out, so there are only a few more weeks to go apple picking. We headed out and of course it was the coldest day we have had yet this year! When we got up at 8am, it was only 31 degrees! And it didn't warm up much from that through the day. On top of that it had been raining the day before and the night before, so we planned on it being sort of muddy. Armed with rain boots, jeans, warm coats, hats, and wrist warmers we headed out. Luckily it wasn't as muddy or cold once we got out there. We picked 27lbs. (the smallest batch yet) of Rome and Golden Delicious apples. Adam has already made a crumb top apple pie last night at his parent's house, and boy was that good! I can't wait to get the apple butter, and apple sauce going tomorrow.
http://kellyheet.blogspot.com/2011/10/apple-picking-2011.html
Apple recipes we have tried and love!
http://kellyheet.blogspot.com/2010/10/apple-recipes.html
Posted by Hippie Mama Kelly at 11:32 AM 0 comments
Labels: apple picking, apples, fall bucket list, fall fun, Garwood
Friday, October 5, 2012
X-ray hands
Welcome to Day 5 and the last day of the Hoosier Horror Blog Hop! This is a craft that I spotted on Pinterest and just knew I had to try it! This one comes to use from Inspired Montessori and Arts.
Supplies needed:
Black construction paper
Elmer's glue
white chalk
Q-tips
I had each child trace their own hand with the white chalk on the black paper. I then showed them how to draw a line with the glue and lay the q-tips on top of it, to make it look like the bones inside our hands. They really liked this! I did have to cut a few with the kitchen shears, but L discovered that if he bent the q-tip twice, they snapped right where he needed it to be. These look nice and creepy for our Halloween display, and they were really easy!
Tracing hands
Posted by Hippie Mama Kelly at 8:00 AM 0 comments
Labels: fall kids crafts, first grade crafts, Halloween crafts, Hoosier Horror Blog Hop, kindergarten crafts, preschool crafts, q-tips, x-ray
Thursday, October 4, 2012
Monsters!
Welcome to Day 4 of the Hoosier Horror Blog Hop! Today's project was something that I came up with totally on my own. I think this turned out great, and I plan on doing it with the kids next year as well, to see how things change.
Today we are using a fun supply called bleeding tissue. How appropriate for Halloween, no? This is not your normal tissue paper that can be found in the cards section of the store. This is a special kind of tissue paper meant to "paint" when wet. This can be found at most art supply stores. We used it before on an Earth day craft!
Supplies needed:
white construction paper
bleeding tissue
spray bottle with water
pencils
black Sharpie Markers
scissors
markers
googly eyes
You will want to lay down some paper or towels over your work surface. This stuff will stain the table. I put down some pages torn from a magazine. I told the kids to rip shapes from the tissue paper and place around their white construction paper. You want it to be somewhat covered. When they were done, carefully spray the paper with water. We let this dry overnight. Next I gave the kids another piece of paper, and a pencil, and told the kids to design their own monsters. This was neat to see what they made. I had them cut this out, this will be used as a stencil. The next day, we removed all the tissue paper from our pages, and traced our own monster stencils with the black Sharpie marker. We cut our monsters out and set to decorating them. I had googly eyes of all sizes, and markers of all different colors. D even got out a bingo stampers to give her monsters spots/chicken pox. These little guys are now hanging up next to our dinner table!
Posted by Hippie Mama Kelly at 8:00 AM 2 comments
Labels: bleeding tissue, fall kids crafts, Hoosier Horror Blog Hop, kindergarten crafts, monsters, preschool crafts
Wednesday, October 3, 2012
Halloween Banner
Welcome to Day 3 of the Hoosier Horror Blog Hop! I hope you are enjoying these posts as much as I have enjoyed getting them ready for you all. This post was inspired by a banner that Organize Your Stuff Now did last year. I had pinned it last year with all intentions of doing it, but time got away from me. This year, I had a quiet morning to myself, and motivation with this blog hop, to get it done. Originally I had intended on making this day's post about our fall bucket list, but realized that I did the exact same post already last year. Oops!
This was a fun craft for mommy, but the kids could easily do this one as well. In fact, as soon as the kids came home from school, they noticed it right away. D even was sad when I didn't have her do the craft, so it looks like I may have 2 of each of these by the end of the week.
Supplies needed:
ruler
pencil
scissors
glue stick
green, white, black, orange, and brown construction paper
markers (I used Sharpies)
I first decided which characters I wanted to make. I knew that I had to have a ghost, Frankenstein's monster, and a bat. The original post had made these as triangles, but I liked the rectangle better. I made mine 5"x7". There really are not any other instructions other than cutting out the shapes you would like for each rectangle, and gluing them all together. For now, I just used a small bit of masking tape on the back of each character and taped them directly to my "mantle" shelf. I think of the next week, I will transfer them to some yarn and string it up under the shelf. I may add more as the month goes on, we shall see.
Frank and Pumpkin
Posted by Hippie Mama Kelly at 8:00 AM 2 comments
Labels: bats, candy corn, fall kids crafts, first grade crafts, frankenstein, ghosts, Halloween crafts, Hoosier Horror Blog Hop, kindergarten crafts, preschool crafts, pumpkins
Tuesday, October 2, 2012
Chalk Fall Leaves
Welcome to Day 2 of the Hoosier Horror Blog Hop! Today we are talking about a super easy but fun craft! Chalk drawn fall leaves!
This post had been inspired by an Inner Child activity that she did a while back, but I put my own spin on it. While shopping at United Art and Education for some Art Smart supplies (more on that later), I saw this great little book by Dover of leaf stencils for under $2! I just knew we needed to get it. There are so many things we can make using this. While, on the drive back home, I got to thinking. Why not use chalk and the stencils and make a similar page to Inner Child's.
Supplies needed:
white construction paper
fall leaf stencil (if you can not find this, you can either make your own using photos printed off the computer, or real leaves!)
q-tips
chalk in fall leaf colors
This craft is a very simple and not very messy craft. I had the kids sit at the dinner table, and pick out a leaf stencil. I showed them how to trace the leaf, using the chalk, and leaving a thick line. Now using the q-tips, just make straight lines from the chalk line out. It will give it a nice smudgy look to it. It took the kids just a bit to get the hang of using enough chalk to create this look. But both kids really had fun. They were amazed at how it looked when we were all done. These pictures are now hanging up and decorating our entry hall walls.
Posted by Hippie Mama Kelly at 8:00 AM 3 comments
Labels: chalk drawings, fall kids crafts, fall leaves, Hoosier Horror Blog Hop, kindergarten crafts, preschool crafts, stencils


