Showing posts with label Halloween crafts. Show all posts

Monday, November 4, 2013

Fall Library Fun! October

This month at the library was another fun filled one! Lego Club, Magic Tree House Club, Science Club, Halloween craft day that I put on, and trick or treating at the library!!


L is picking up on our Dr. Who fandom and created what he thinks the Tardis should look like.


This month, the book we read for the Magic Tree House was Dolphins At Daybreak. The kids had a blast doing fun activities, one of which was making deep sea diving masks. Here they showed them off for me.

This month for Science Club we learned about bats! They had this neat experiment showing us a little about echo location. Using paper towel tubes and a pie pan, each friend takes turns whispering into the tube angled at the pan while the other friend listened. They also made little paper bats to hang up at home. Both of my kids kept them in their science notebooks.


Our annual Halloween craft day! We had toss a dice monster drawings...


Thumbprint spider webs...


foam mummy ghost bookmarks, along with potato stamp ghosts, and spider play dough.


And lastly one of the libraries had a great Halloween afternoon. The kids got to come in costume, make crafts, listen to stories, see a puppet show, and go trick or treating to stations from local companies. A great time was had by all!!!


Monday, October 21, 2013

Halloween crafts Part 1 2013

We have been really inspired by some great crafts this year. Here is a taste of what we have been up to!


Fall Leaves

Origami Spiderwebs

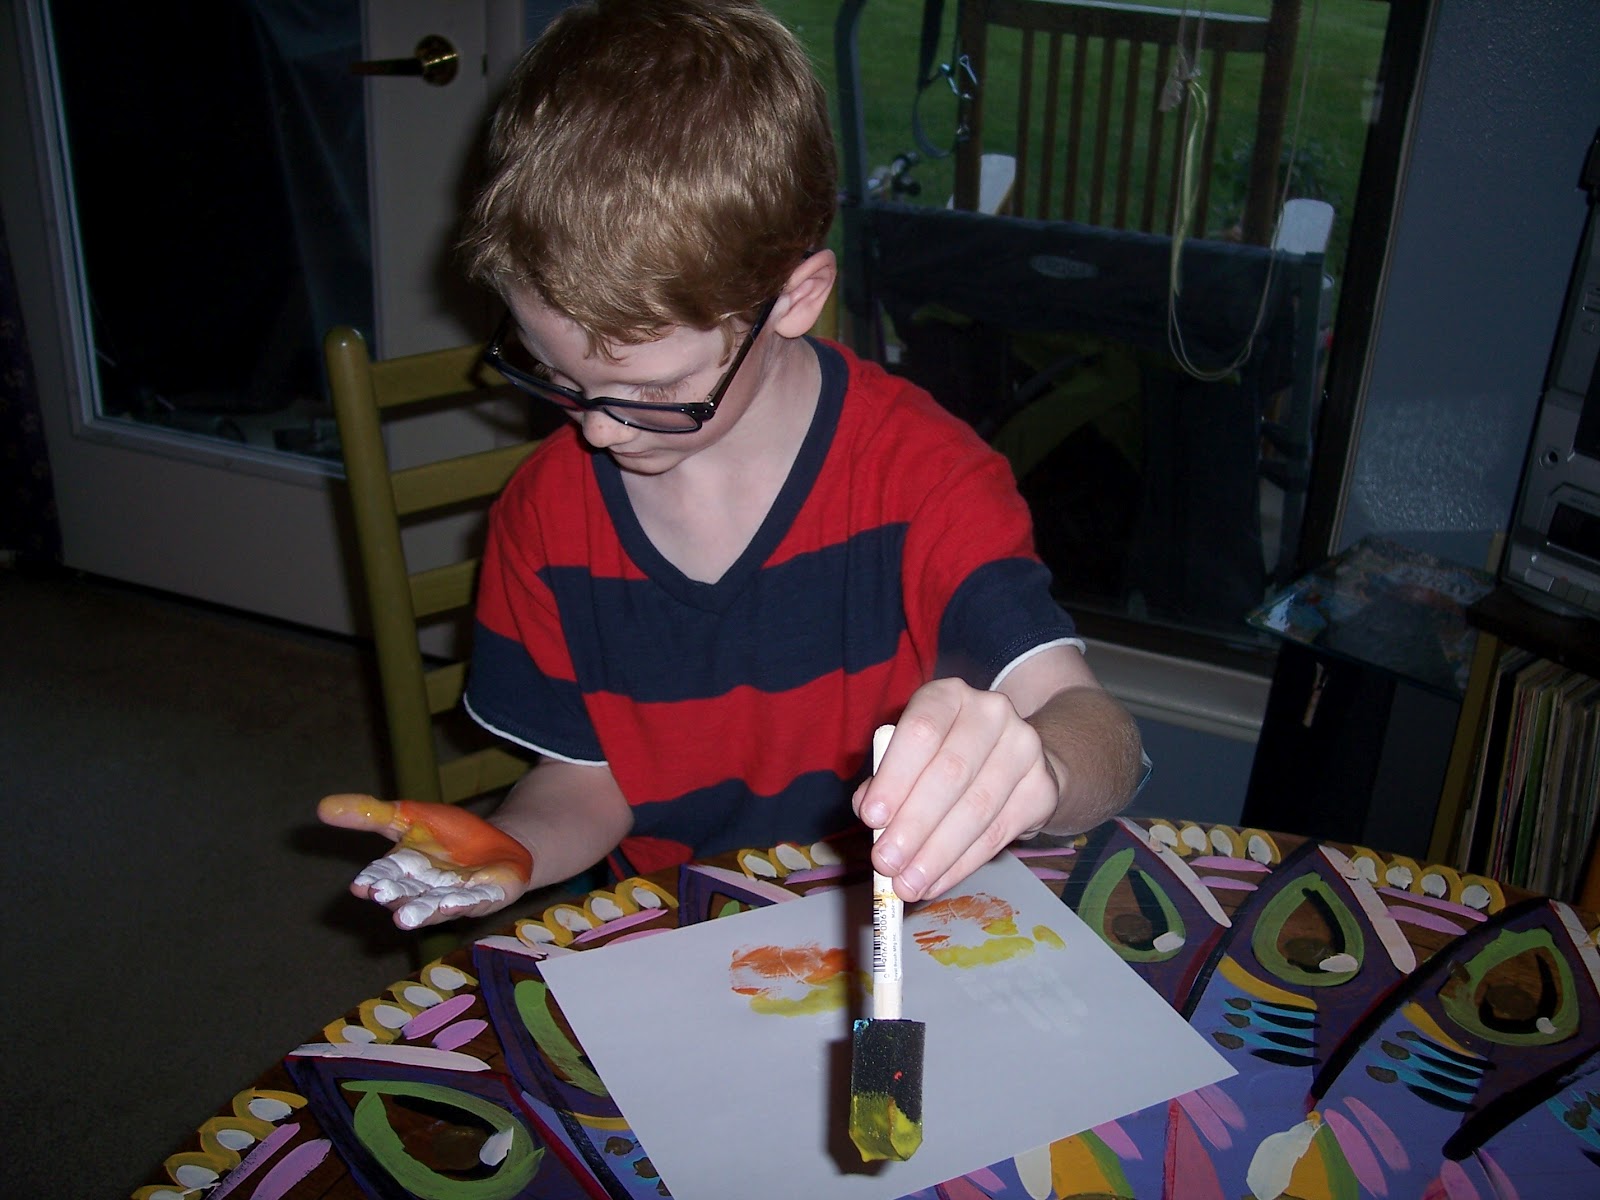
Yearly Candy Corn Hand prints

Sponge painted Bats

Glue and Chalk Spider webs

Princess Leia buns


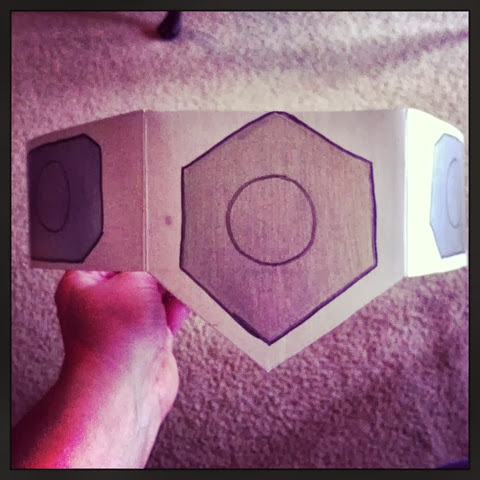
Princess Leia belt

Boo S'mores
Inspiration found from these wonderful blogs for all these crafts!
Fall Leaves
Spider Web Origami
Candy Corn Hand prints
Bats
Pastel Spider webs
Princess Leia buns
Boo Smores


Friday, October 5, 2012

X-ray hands

Welcome to Day 5 and the last day of the Hoosier Horror Blog Hop! This is a craft that I spotted on Pinterest and just knew I had to try it! This one comes to use from Inspired Montessori and Arts.

Supplies needed:
Black construction paper
Elmer's glue
white chalk
Q-tips

I had each child trace their own hand with the white chalk on the black paper. I then showed them how to draw a line with the glue and lay the q-tips on top of it, to make it look like the bones inside our hands. They really liked this! I did have to cut a few with the kitchen shears, but L discovered that if he bent the q-tip twice, they snapped right where he needed it to be. These look nice and creepy for our Halloween display, and they were really easy!


Tracing hands


The kids were really excited that these really did look like bones in the hands!


Wednesday, October 3, 2012

Halloween Banner

Welcome to Day 3 of the Hoosier Horror Blog Hop! I hope you are enjoying these posts as much as I have enjoyed getting them ready for you all. This post was inspired by a banner that Organize Your Stuff Now did last year.  I had pinned it last year with all intentions of doing it, but time got away from me. This year, I had a quiet morning to myself, and motivation with this blog hop, to get it done. Originally I had intended on making this day's post about our fall bucket list, but realized that I did the exact same post already last year. Oops!

This was a fun craft for mommy, but the kids could easily do this one as well. In fact, as soon as the kids came home from school, they noticed it right away. D even was sad when I didn't have her do the craft, so it looks like I may have 2 of each of these by the end of the week.

Supplies needed:
ruler
pencil
scissors
glue stick
green, white, black, orange, and brown construction paper
markers (I used Sharpies)

I first decided which characters I wanted to make. I knew that I had to have a ghost, Frankenstein's monster, and a bat. The original post had made these as triangles, but I liked the rectangle better. I made mine 5"x7". There really are not any other instructions other than cutting out the shapes you would like for each rectangle, and gluing them all together. For now, I just used a small bit of masking tape on the back of each character and taped them directly to my "mantle" shelf. I think of the next week, I will transfer them to some yarn and string it up under the shelf. I may add more as the month goes on, we shall see.


Frank and Pumpkin

Upside down Bat, and Candy Corn

Ghost

The whole crew on the shelf


Monday, October 1, 2012

Candy Corn Handprints

First off I want to say welcome and thank you! I am participating in my first ever blog hop this week! I am linking up with the Hoosier Horror Blog Hop for this entire week. Check back every day to see a fun new fall/Halloween craft from me!

This first craft was something I had wanted to do last year, and just never got around to it. I have looked at a footprint version of this on Pinterest before, but thought hands would be just as cute. The kids and I made candy corn hand prints before dinner the other day. This is a quick, simple, easy, and little mess sort of craft.

Supplies needed:
manila construction paper (we used white and black and it just didn't show up all that great)
orange, yellow, and white washable paint
paintbrushes
small dishes for paint (I used a cut up egg carton)
baby wipes

I started by showing the kids where on their hands to paint each color. With the white I showed them to paint up to the 2nd knuckle lines, orange from the base of the palm to where the thumb connects, and the yellow in between. I tried this first myself on the black paper. It worked alright, but the orange hardly shows up. Then we tried this on the white paper, and of course it is hard to see the white paint. I think if you used a tan or manila paper, it would work best. I let the kids go ahead and paint their own hands for the first time. I figure at 5 and 6 and with all the hand painting we have done in this house, why not! We let them dry on the bathroom floor while we ate dinner (only place easy to clean and out of the way). I then cut them out and had the kids glue them to a black piece of paper, just to make them stand out a bit more.

We finished the night with some stories, and with leaf cookies. On Friday, I had started to help with D's kindergarten class. Once a month on a Friday, parents get to come in with a special sweet treat to share, and read a favorite book to a small group of kids. I asked D what type of book I should read and what kind of cookie I should make. Her response was, "It has to be a book about fall, and the cookies need to be leaf shaped with orange icing". So that was just what I did ;-)


Supplies out and ready to go
(Like my crazy painted table? Adam did that over the summer.)


See how both the black and the white paper had pluses and minuses?


For more Halloween fun crafts, check out what we have done in the past:
2011: http://kellyheet.blogspot.com/2011/10/halloween-crafts-2011.html
2010: http://kellyheet.blogspot.com/2010/10/halloween-crafts.html
Frank and Pumpkins: http://kellyheet.blogspot.com/2010/10/frank-and-pumpkins.html
Monster Mash: http://kellyheet.blogspot.com/2010/10/monster-mash.html


Wednesday, October 19, 2011

Halloween crafts 2011

So yesterday was our group Halloween craft day! We had 7 stations this year, and it seemed like all the kids had a blast. 

This was marble painted spider webs. I was told about this one by L's teacher.
 Our finished webs
 Egg carton spiders. These we cut the cups of a paper egg carton, punch holes in the bottom, and slide in black pipe cleaners for the legs. Add 2 eyes, and you are done!
 A bunch of the kids finished projects.
 D working on her witch hat.
 Paper plate ghosts. Construction paper eyes, and mouth, and crepe paper streamers.
 Recycled Box Mummies. We wrapped white crepe paper around empty boxes and glued giant eyes to them.
 Tissue paper pumpkins. Paper plates, with glued on tissue paper. I showed the kids two ways to put the tissue paper on the paper plate. Most did the flat method.
 Toilet Paper Tube Bats. Wrap black construction paper around the tube, and glue on bat wings and eyes.
 And two gross snacks both found on pinterest.  These are bloody band-aids. Graham crackers with colored frosting.
 And dirty q-tips. Mini marshmallows on tooth picks, dipped in melted butterscotch chips.
Books we read:
Where's my mummy? by Carolyn Crimi 
Corduroy's Best Halloween Ever! by Don Freeman
Boogie Knights by Lisa Wheeler

Related Posts with Thumbnails