Showing posts with label carving pumpkins. Show all posts

Tuesday, November 17, 2015

Halloween night

Life has been crazy busy in our house during the month of October, so we hadn't gotten around to carving pumpkins yet. With Halloween falling on a Saturday this year, it worked out perfectly for us to do it the afternoon of Halloween. So we turned on Nightmare Before Christmas, got out the carving tools, and got to work. The only problem was that all the stores were out of pumpkins, except these 3 "ornamental" pumpkins. Oh well, it gave them character!



We ended up with Pikachu, Jack Skellington, and a funny witch.


We then had a light snack, and got in our costumes. D had switched from Misty from Pokemon, to a much more weather appropriate Pikachu costume. The first 15 min of trick or treating was slightly rainy. The temps had dropped the night before, but were not too bad. We just made sure to wear layers, and grabbed umbrellas. Luckily the rain pretty much stopped until the last 10 minutes of trick or treating. We headed to the same neighborhood that we have gone too for the last few years. It really is the best, most of the houses are home and close together. Most years the neighborhood is packed, but this year it just didn't seem as busy. My kids were determined, and made it almost the entire 2 hours!


And of course as soon as we got home, while I was making the pizza, they both had to dump all the candy out and sort it. Both were excited that this was their biggest haul ever.


Tuesday, November 5, 2013

Pumpkin Carving 2013

Our entire family LOVES carving pumpkins! We have done it every single year since Adam and I met. Not only have we taught our children how to do it, but we also taught our exchange students how to years ago.

We have each of the kids draw a few options on paper before they get going on the actual pumpkin. Once they have the design they like best, they draw them on the pumpkin using a black Sharpie marker (or as the kids call them "Mommy markers").

Adam and I are made to cut the top off the pumpkin and scoop out the "guts". Honestly for scooping we have found that a metal soup spoon works the best. All the innards go into a big bowl where we can later roast the seeds. (We like leaving a little of the flesh on the seeds while roasting, they turn out the best that way!)

We then give the kids the Pampered Chef kid safe knives to carve out the face shapes. These are the best for the job! We don't have to worry about the kids accidentally cutting themselves and they saw through the pumpkin with ease.


D's pumpkin

My pumpkin

L's pumpkin


Friday, November 18, 2011

Halloween 2011

I know, I know, this is like really behind! But October was just crazy busy this year. On top of the normal Halloween fun times like a party, trick or treating, carving pumpkins, and zoo boo, we had a wedding. The groom was Adam's friends since middle school and he had the honor of being Best man. So there was tons of fun getting ready for that!

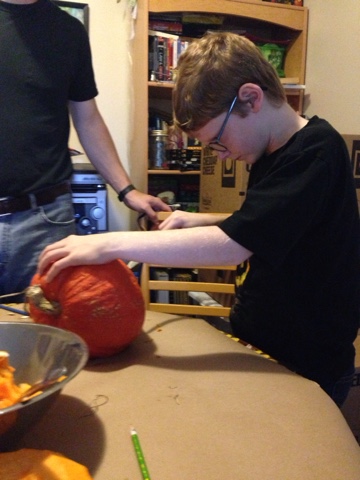
This year the kids did most of the pumpkin carving fun. They did need help cleaning out the pumpkin guts, but they designed them and did most of the cutting. They turned out fantastic!!!


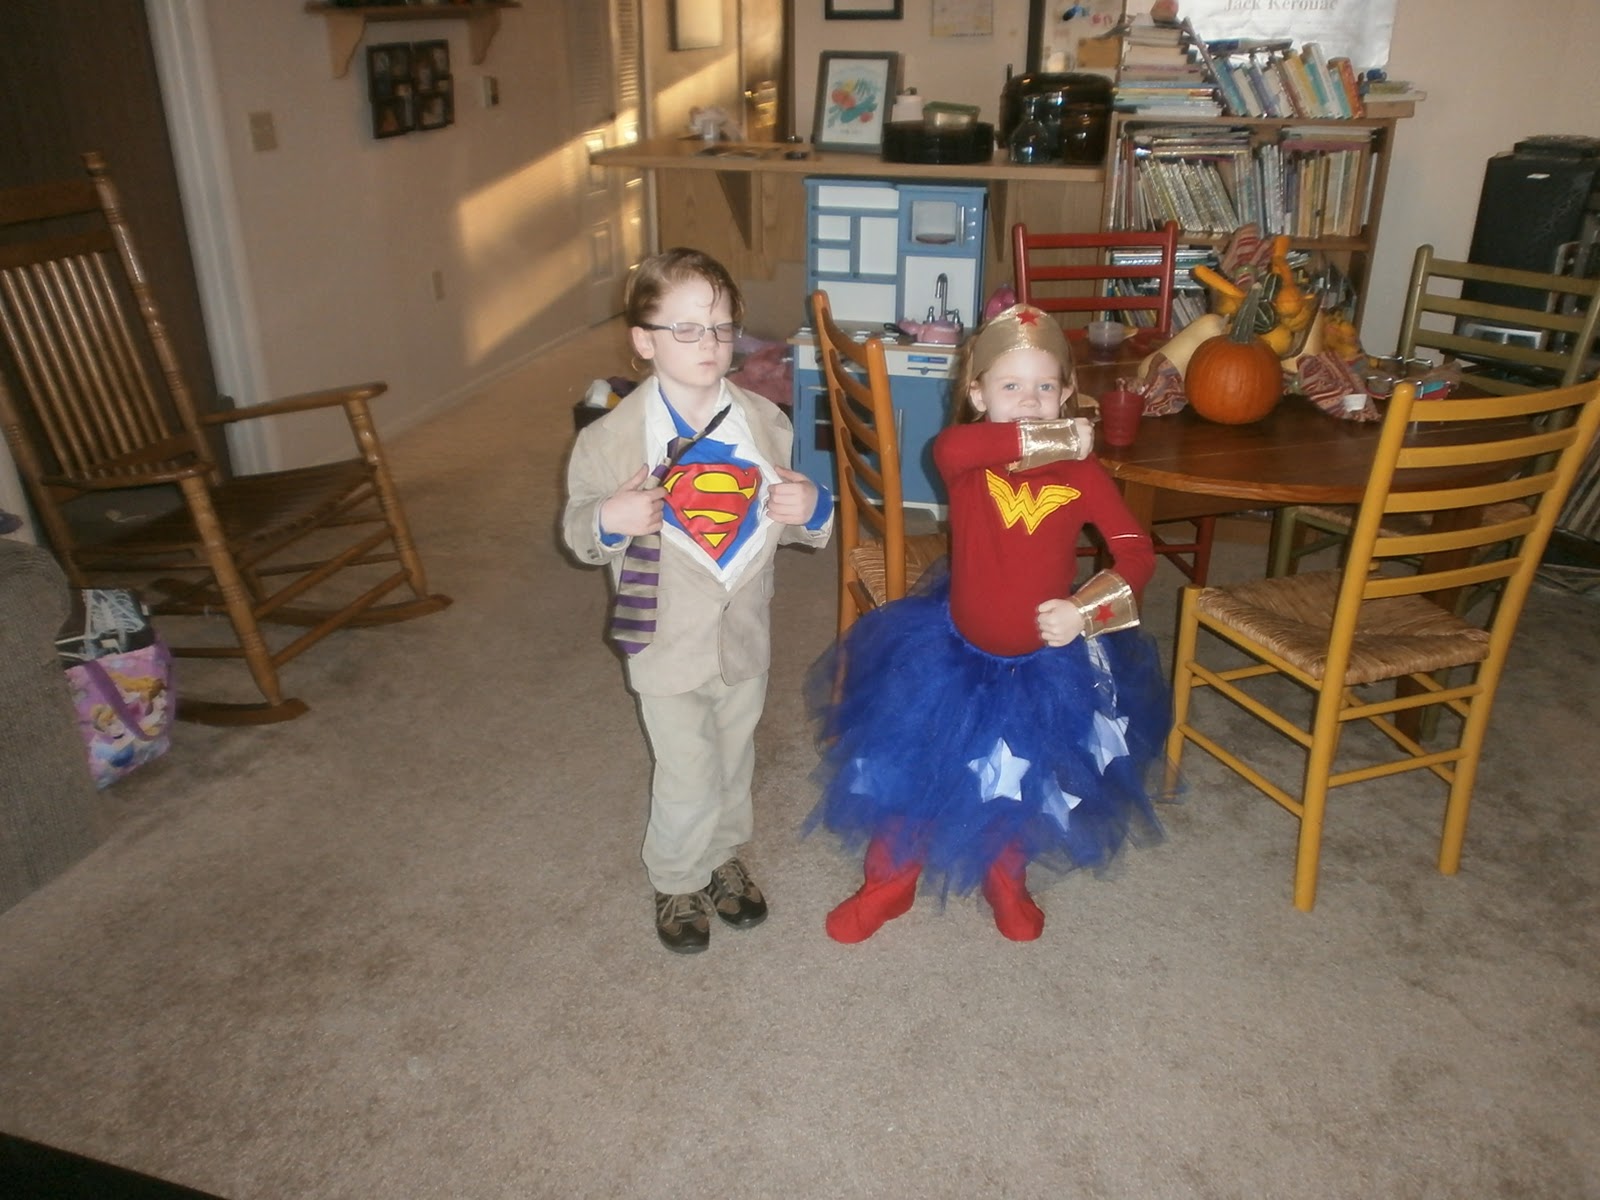
This year L decided to be Clark Kent, and D decided to be Wonder Woman. For L's costume it was so super easy! He already had the pants, shoes, tie, glasses, and long sleeve superman t-shirt. I headed to Goodwill and found the dress shirt and sports coat for only $7 total! Add plus was that he then was able to wear it for the wedding. Score! For D's costume, we were inspired by this post that I found on pinterest.com. She had on jeans under the tutu, the red turtleneck was also purchased from Goodwill, her Hello Kitty rain boots were just simply covered in a red fabric. The tutu was made out of a piece of elastic, blue tulle, and white felt for the stars. The cuffs and headband were made from a shiny gold fabric, and the stars were made of a sticky backed red foam. The "W" on the shirt was just a piece of yellow felt that I drew the symbol on and then stitched on the shirt with red thread. I think they both turned out great! L did get frustrated that most people either called him Harry Potter or just Superman. Oh well.


 The moms group held our traditional Halloween party in the library. We did not do any crafts at the party but decorated with the crafts we made earlier in the month. We did play some games found from Parents magazine. Pin the tie on Mr. Bones, and Jack O'lantern toss game. We also read some stories (look at the bottom of the post for links), and had a costume parade all through the library.
The cookies I made inspired from pinterest!
 These were yellow cupcakes, with a green vanilla pudding middle. Slimy!
 This was the first year the kids got to go trick or treating with a group of friends. It was a blast, and we can't wait to do it like that next year!


Books we read:
Go Away Big Green Monster by Ed Emberley
Ghosts in the House by Kazuno Kohara
If you are a monster and you know it by Rebecca and Ed Emberley

Wednesday, October 19, 2011

Halloween crafts 2011

So yesterday was our group Halloween craft day! We had 7 stations this year, and it seemed like all the kids had a blast. 

This was marble painted spider webs. I was told about this one by L's teacher.
 Our finished webs
 Egg carton spiders. These we cut the cups of a paper egg carton, punch holes in the bottom, and slide in black pipe cleaners for the legs. Add 2 eyes, and you are done!
 A bunch of the kids finished projects.
 D working on her witch hat.
 Paper plate ghosts. Construction paper eyes, and mouth, and crepe paper streamers.
 Recycled Box Mummies. We wrapped white crepe paper around empty boxes and glued giant eyes to them.
 Tissue paper pumpkins. Paper plates, with glued on tissue paper. I showed the kids two ways to put the tissue paper on the paper plate. Most did the flat method.
 Toilet Paper Tube Bats. Wrap black construction paper around the tube, and glue on bat wings and eyes.
 And two gross snacks both found on pinterest.  These are bloody band-aids. Graham crackers with colored frosting.
 And dirty q-tips. Mini marshmallows on tooth picks, dipped in melted butterscotch chips.
Books we read:
Where's my mummy? by Carolyn Crimi 
Corduroy's Best Halloween Ever! by Don Freeman
Boogie Knights by Lisa Wheeler

Tuesday, November 16, 2010

Pumpkin Carving 2010

This year pumpkin craving was awesome!  I had the kids sit down at the table and draw out a picture of how they wanted their pumpkins to look.  They had great, do-able ideas!  Adam cut open the top, we sat the pumpkins on the kitchen floor and let the kids go at it.  They loved digging out all the pumpkin guts with their hands and spoons.  We then drew the faces they designed with marker, and gave them kid friendly knives.  We have this one from Pampered Chef, and it works great for carving pumpkins!!  When we were all done, we took the pumpkins outside to the front porch and lit them with flameless tea lights I picked up from Dollar Tree (2 pack for only $1). 


Wednesday, October 28, 2009

Pumpkin Carving

Now let me start by saying that we now have 9 pumpkins in our house, not including the fun little decorative gourds. But Adam came home from work last Thursday and surprised us with 2 good size pumpkins for the kids to carve. They were soooo excited. So far this year we have painted, used Mr. Potatohead stuff, and had face stickers to decorate pumpkins, but this was the first time for carving this year. We got down to work as soon as they were out of the bag! L and D had a great time pulling the guts out. We examined all the seeds and strings. We have read a really great story about how a pumkin comes from a little white seed, and the path that it takes to grow and become a pumkin. The story is Pumpkin Shivaree by Rick Agran I highly recommend it! The kids told us what shapes they wanted for the face and we helped them cut it out. My mother-in-law had gotten us this really cool Pampered Chef kids knife so the kids can help us in the kitchen, and it worked amazingly with the pumpkins. The kids were able to cut through all by themselves with us just making starter cuts. They had a blast! I just realized that I don't have any pictures of the finished pumpkins. Well I will work on that later. For now just enjoy the process pics!

Miss D watching her brother before she starts

L really digging in

Showing off the pumpkin guts


Not to be outdone!

Asking daddy for help

We did roast out seeds after we were done, and they were super tasty. I'll see if I can find that recipe as well!

Related Posts with Thumbnails