Thursday, February 25, 2010

Melissa and Doug giveaway!

If you go here! Melissa and Doug is having a great giveaway. You can win a

Sunny Patch Raincoat, Pair of Boots, and Umbrella!


These are super cute, and I really hope that I win. Both of my kids just love everything this company has to offer. To enter it is really easy. Just leave a comment on any 1 other toy you would like from them. It is sooooo easy! You can win more entries by tweeting or blogging about it. Please, try it out.

Wednesday, February 24, 2010

Slow Cooker Coq Au Vin


I think I got this recipe out of the Family Circle magazine, but it was amazing!!! Adam is not a fan of slow cooker meals all the time, but we both agreed that this is one I will have to make again. Even the kids ate bites of it, okay, so not the mushrooms or the onions, but they ate the chicken and rice. That is always a good sign, right????


Here is the recipe!


4 boneless chicken breasts
16 oz. pkg. sliced mushrooms (I used fresh)
15 oz. jar pearl onions (not all my grocery stores had these)
1/2 cup dry white wine (2 buck chuck from Trader Joe's)
1 tsp. dried thyme
1/2 tsp. salt
1/2 tsp. pepper
1 bay leaf
1 cup chicken broth
1/3 cup all purpose flour
cooked rice
optional: fresh parsley, chopped


Place chicken in a 5 quart oval slow cooker; top with mushrooms and onions. Drizzle with wine, and sprinkle with thyme, salt and pepper; add the bay leaf. Stir together broth and flour, and pour into slow cooker. Cover and cook on high one hour; reduce heat to low and cook 3 hours. Discard bay leaf. Serve over rice, sprinkle with parsley, if desired.

Snowmen


The snow has finally been the perfect snow to build snowmen!!!! We have had tons of snow, but nothing good enough to make snowmen out of. And of course every time it snows, the kids ask if we can make them. So we headed out and went crazy with building! After we made the first snowman, L insisted that he needed to make snow ball soup. It was super cute. Then they made a second one but got tired after just one of the snow balls. Oh well, that meant Adam and I had to finish it. Darn! So after 2 snowmen, a snowball fight, and shoveling snow, we headed in for big mugs of hot chocolate. What a great weekend!

Valentine's breakfast

So for a late Valentine's day breakfast the week after, I made heart shaped pancakes, topped with strawberries and powdered sugar. I used Tastefully Simple Mulling spices in some cran-apple juice and warmed that up. I got the kids books from Borders for dirt cheap ($3.99 for a good size book!), and chocolate hearts from Walgreens (2/ $2.99!). The mailboxes I found in the dollar section and decorated them for each member of the family (thanks for the idea Abby!). And then I made little Valentine's day cards for each of them out of the scrapbooking paper that I have laying around the house. It made for a very cheap Valentine's day, and I am thinking of waiting to do it the weekend after every year now to save a ton on money.


To make heart shaped pancakes: I found a cheap plastic ketchup bottle at Meijer for $1, and use pancake mix like Bisquick or Aldi's brand. Mix it up and pour it into the ketchup bottle. Then you can use it to make all different shapes, letters, and numbers. The first time I used it we made the kids names in pancakes. They thought it was awesome and ate more than they normally do.


Happy belated Valentine's Day!

Well I know that I'm a little late with this, but life has been busy! As you all know we have a silly tradition of going to White Castle for Valentine's day. Here is the post from last year! So this year we just had to do the same. It has been 4 years and running now, and I don't see us stopping it. Because we were soooooo busy on Valentine's day this year, and I didn't feel that great, I surprised the family with a late Valentines day breakfast and presents. Nothing to crazy, but I did get the candies for 50% off from Walgreens. I may do this every year now ;-) I'll post those photos on another posting.


I had asked Adam to take a picture of the kids in their cute holiday outfits, and this was the shot I got. Don't get me wrong, it is a great shot of the kids, you just can't see the clothes. Oh well!!!


Adam at White Castle

Cute little D!

L totally hamming it up

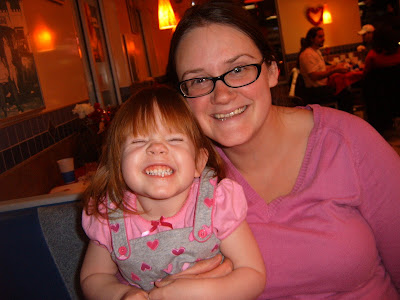
Mom and daughter, boy is she strange!
So as you can tell we didn't get our yearly family photo, but that is totally alright. I still have fun looking at these pictures compared to the last few years.

Tuesday, February 9, 2010

Homemade Crayons

I have wanted to do this for some time now, but I wasn't sure what the right method to use would be. So I listened to the complaints my friends had, and read a blog from a fellow mom, and came up with my own way. I got the great idea to do this now because my friend's little boy is having his first birthday party this weekend (look surprised Stacey!), and I thought it would be fun to make washable ones for him. Then I got the great idea to make these for the kids coming to the mom's group Valentine's day party this week (look surprised girls!). It turned out to be more work then I expected, but that was because I realized halfway through that there were 22 kids coming to the party. The actual work itself was super easy!

Supplies you will need:
-recycled cans (I have been saving my cans from veggies, sauces, beans, whatever, clean them out before use.)
- broken or access crayons in whatever colors you want to make (I divided mine into colors)
- a saucepan (one that it doesn't matter if it gets crayon in it. I bought one just for this project from a thrift store for $1.20!)
- plastic spoons
- wax paper
- a mold of some sort (I had silicon ice cube trays that I got from Target in the dollar section, they are $2.50 for a 3 pack, or you can use muffin tins, regular or disposable, candy molds, whatever you like! I was just at Ikea and they had fun shaped ice cube trays that would work for $.99!)
- tongs
- oven mitt

Now, to start, you will want to take all the paper of the crayons. After hours of peeling with my aching nails, Adam came home and ran a exacto knife down the side and the paper came off very easily! So do that, please! I then separated the colors that I used into it's own can. I laid down 2 sheets of wax paper underneath my working surface to protect my counter. Set out the molds you have on top of the paper. Put your saucepan on the stove top, place a can in, and fill with water until the can is about to float. I had the heat on med-high, and once the crayons start to melt, stir them with a plastic spoon. Once the wax has completely melted, pick the can out of the water with the tongs. I set it on the wax paper and got a better grip with the oven mitt, then poured the wax into the molds. Make sure you fill the molds (at least my ice cube trays) to make it easier to get the crayons out. Let cool until you can touch. Then you can either take the crayons out of the mold (I found that the ones I left in the mold over night were difficult to take out), or layer another color on top. The first batch that I made were the washable crayons and those were just one color. The next batch for the Valentine's party, I made 2 layers. I layered red/orange, blue/purple, yellow/green, and black/brown. Take it from me, you may want to make the yellow ones first, of layer the green on first. Mine took some of the red color from the red crayon batch, but still are mostly yellow! For now I have just stacked them on plates, ready to be put into bags to take with to the parties. I hope this helps some of you looking to do this. If you use this method, let me know what you think and what shapes you make. I'm curious!


Crayons in the cans melting away!

Colors waiting to go

The washable ones in the mold

The finished 2 layer crayons. I think they turned out cute!

Related Posts with Thumbnails